Showing posts with label hair growth. Show all posts

2.02.2018

January Length Check

TGIF! It's the start of a new month and we are long, long, long overdue for a length check. The last length check that I did was in May so it's been a whole 8 months since I checked the growth progress of my hair. This post is not going to be very long because I tend to get straight to the point when it comes to length checks.

I consider these length checks to be informal because the only way to see your full length is to straighten your hair, which I haven't done since I went back natural because I'm absolutely terrified of heat damage. One day soon perhaps... ๐Ÿ™ˆ

Checking my growth has become a science. I basically check the 3 longest points of my hair: My nape, the top of my head (not quite the crown), and the hair above my ear.

I started with the nape, and that length turned out to be around 9 inches. I try to keep my head straight in order to get an accurate measurement, especially since I did not have my length check shirt to mark my progress. I also pull the hair from my nape and measure it against my chest.
9 inches from the nape!
Next, I measured the hair on top of my head, but not quite the crown because my crown isn't the longest part of that section of my head. That measured in at about 9 inches as well, which was surprising because my hair tends to grow in layers. Also, I was excited because when I pulled the hair over my face, it was close to touching my chin!
Lastly, I measured the hair above my ear because it tends to grow quickly as well. I counted the measurement at 8 inches only because the ends looked like they needed a trim. But let's just say that it's 8 and a half inches for now.
That's basically it for this month's length check. This wasn't as in-depth as my previous length checks but that's because I want to reserve what I've been doing to my hair in my upcoming Winter Hair Regimen post. Thank you for reading and have an awesome weekend!

6.01.2017

May Length Check: Six Months Post Chop

May has officially ended and that means another length check! This month marked the end of a long semester for me and it has also brought me some interesting findings. 

While I usually do my length checks using the hair above my nape, I recently discovered that it was not the longest part of my hair. It's actually the hair behind my ear that's the longest. When I measured the hair at my nape this time, it was 7 3/4 inches. The hair behind my ear measured at 8 inches, as pictured below. 
In last month's length check, I mentioned that the hair above my nape was 7 inches, which means that I've had pretty average growth this month. Compared to the growth I had between April 4th and April 30th it was not much, but that doesn't take away the excitement that I feel for having surpassed 8 inches. Not bad for 6 months post big chop! It's amazing that I've been fully natural for half a year, and despite the long wash days and my overall willpower to take care of my hair, I'm extremely proud of myself for the progress that I've made. 

As you can see from the back, I am about to hit armpit length again, this time with unprocessed, natural hair. 
Please overlook my unkempt hair. It was washed this past Sunday and I've just been keeping it banded until I go to the hair salon on Friday to get my protective style for my trip in a few days. I'll be traveling to Boston this Saturday to visit my family and friends, and you guys will definitely get to see the finished results! 

That's pretty much it for today, guys. Thank you so much for reading and I'm wishing you a fun-filled summer. The next time you hear from me, I'll already be in Boston. Peace out! ✌

5.17.2017

Fenugreek-Moringa Oil for Hair Growth & Thickness


In my fenugreek hair spritz post, I mentioned that I took inspiration from some of these concoctions from my favorite natural hair YouTuber, Ife of ife360tv. My latest concoction was inspired by her as well. I used whatever oils I had lying around my bedroom, but the two main ingredients that make this recipe so unique is the mixture of Fenugreek seeds and Moringa powder. 

Consuming Moringa in my smoothies in tandem with using it in my massage oils or hot oil treatments may possibly aid in hair growth. It's pretty impressive considering I haven't had time to care for my hair like I usually would over the past few weeks. One day I'll follow the recipe exactly but for now, I have tons of oils that are in need for use. Here's the link to Ife's recipe. 

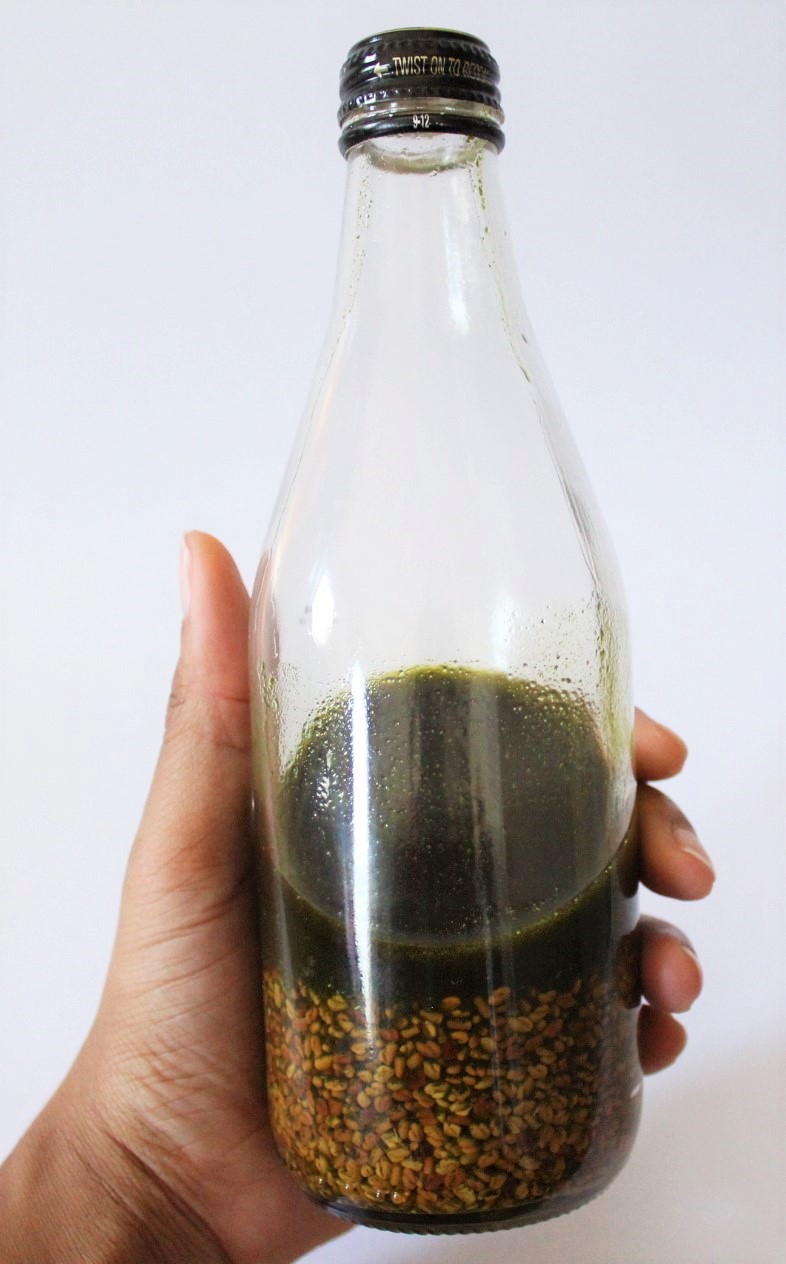
If you have different oils than me, feel free to make your own mixture, but don't forget the Fenugreek seeds and Moringa! Make sure to use a glass container to store your oil as well. I started by toasting about 1/4 cup of Fenugreek seeds in a skillet. They brown pretty quickly so just keep stirring them around the pan so that they toast evenly. Let the seeds cool completely before adding them to your glass container. 

I then added 3/4 cup of Extra Virgin Olive Oil, followed by a heaping tablespoon of Moringa powder. Use a funnel if you'd like to avoid making a mess, and give the mixture a good stir. 
Add in your other oils and stir again. These are the remaining oils I used, which included Peppermint oil and Jamaican Black Castor Oil. I also added a few drops of Rosehip seed oil. 
However, my favorite oil at the moment is this Reshma Henna oil. It has five different oils: basil oil, olive oil, jojoba oil, henna extract, and cedar wood oil, that help to nourish a dry scalp and skin. I love it not only because it's moisturizing, but because it smells like tea! ๐Ÿ˜

And there you have it! Your Fenugreek-Moringa Oil. Here are a few tips I recommend before using this oil. 
  • After creating this mixture, I was inclined to immediately slap it onto my scalp and start massaging. But I followed Ife's advice and left it out in a sunny area for about a week before using it. The color will change considerably but that's because the oils have had time to settle into each other. 
  • Stir before each use, of course. 
  • This is a last-minute tip, but use a piece of cheesecloth or pantyhose to strain the oil before applying it to your scalp. I learned this the hard way this past weekend. Because the Moringa powder doesn't really dissolve into the oils, putting it on your hair may leave behind tiny green balls of residue. A regular strainer may not work because the holes are too big to prevent the powder from getting into your hair, so that is why I recommend using a cheesecloth or pantyhose. 
If you try this recipe with different oils, let me know what you used and how it worked out for you. I'll make sure to post an update so you guys can see how much my hair has grown after using it. Once again, thank you so much for reading and happy Hump Day!

5.15.2017

April Length Check


Welcome back, guys! What a crazy few weeks it has been. It feels like forever since I've posted. Life happens and sometimes and you gotta do what you gotta do, but I promise I'm back this time. For my St. Thomian readers I hope you all had an awesome J'ouvert and Carnival! 

Yet another month has passed and I've gained some more length. During this monthly length check, I kept track of the maintenance and habits that I kept up with throughout April and I'm still making adjustments as I go. Since I've been so busy lately I haven't had much time to really care for my hair like I usually do, but I think I did pretty okay considering the growth I achieved. 

Right now at its longest point, my hair has finally reached 7 inches. I kept my hair in its usual twists while moisturizing and massaging my scalp ever so often. I suspect that consuming Moringa in my smoothies is lending its hand to my growth as well as my waistline. You'll find out more in my next Smoothie Saturdays post. ๐Ÿ˜‰ 

At first, I was going to do my length checks at the beginning of each month however, I changed my mind and decided that it would be best to do it at the end of each month. As this month is halfway over, you'll be seeing another one of these posts in about fifteen more days. As you can see, as I stretched my hair to see it's true length, it's considerably longer than my first length check. I have officially surpassed collarbone length!

Here is me breaking my arm to hold my strands from the back. Hopefully, on the next length check, I'll be able to hold my hair comfortably.
As far as length checks go, it's pretty self-explanatory so enjoy the rest of the pics. 
This post wasn't very long but I'll be back pretty soon with another post. And guess what? I'm now on Snapchat! Follow me at Hair, Health & Heart! I'll be showing all my behind the scenes antics and other fun stuff. Thanks for reading and have an awesome day!

4.06.2017

Create Your Own Length-Check Shirt!

Creativity is in my blood, and I truly believe that it runs on both sides of my family. A huge part of my love for crafting is the fact that I have the ability to make certain things instead of spending money to get them. I was not willing to spend money on a length check shirt simply because there are better things I could use that money for and, I really just wanted to make my own. ๐Ÿ˜

The other day, I was going over some old clothes that I planned to add to the "Goodwill" bag to donate, and I came across a tie-dye shirt I designed in 2014 at the daycare I used to work at. It was my first time ever doing tie-dye and my co-workers and I had fun creating our own shirts as well as shirts for the kiddies.
This was right after it dried in the sun. The colors were so vibrant!
As you can see, the tie-dye had faded considerably since then. I didn't want to donate the shirt because it reminded me of the amazing experiences I had while working at the daycare, and that's when I decided that it would be perfect for a DIY length check shirt. There's always a variety of craft items in my house at any given time, so I did not have to go out to buy any supplies. If you're planning on doing this yourself, you'll need a t-shirt, a ruler, masking tape, acrylic paint, some cosmetic sponges and of course, paint brushes. 

I created the measuring tool on the back of the shirt according to the average length check chart. In order to get the most accurate measurement, I had my sister help me mark my armpit, my bra strap, the middle of my back, my waist, my tailbone and my hip.
Before you paint anything, make sure to put a piece of cardboard in between the shirt to prevent the paint from bleeding onto the front of the shirt. I forgot while doing the first application but the bleeding isn't too visible on the front. I then used masking tape as a stencil for the lines. I made sure that the edges were as smooth as possible to prevent the paint from seeping underneath the tape, and I used the cosmetic sponge to paint each line. Two coats were enough for me since I used black paint.
Next came the best part: peeling off the tape. Look at those crisp lines!  
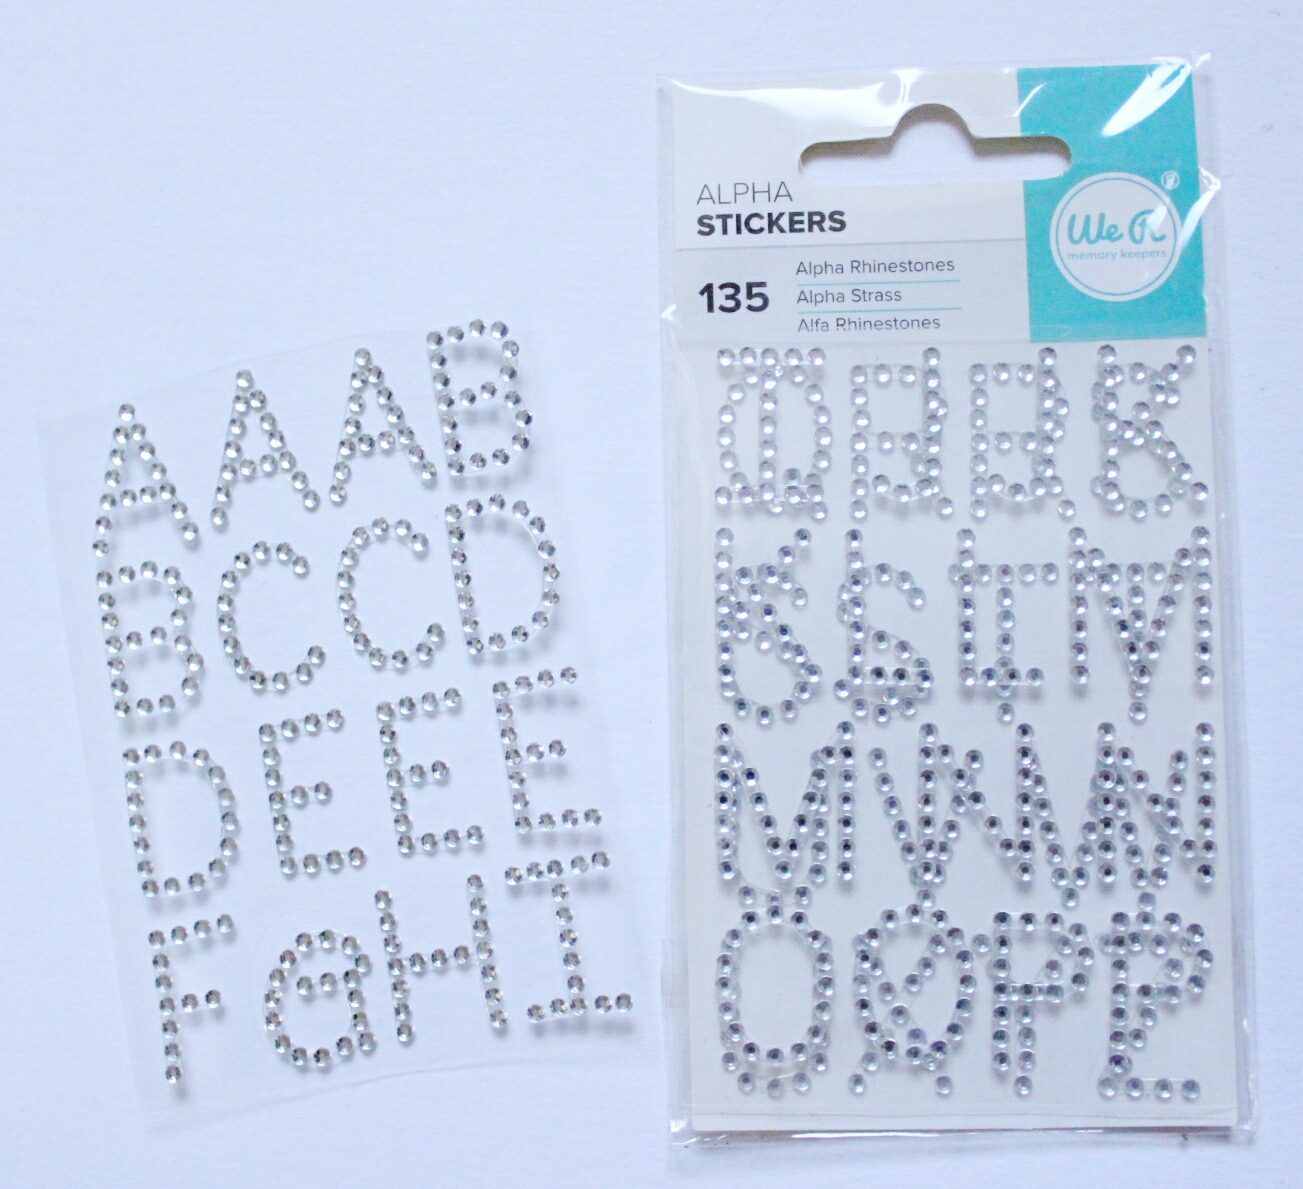
Instead of painting the acronyms for each measurement, I decided at the last minute to apply some rhinestone letters for a more glamorous look. 
Although I consider myself to be a perfectionist, I was surprisingly excited to paint my own designs and motivational messages by hand. I also did it by hand because I didn't have letter stencils. So the perfectionist in me said...
Here's the final product!
As for the front of the shirt, I'll be using the blank space to mark my progress each month as well as my length in inches. Since I've recently hit collarbone length, I marked the month and length. This progress is amazing considering I was past armpit length with my relaxed hair not too long ago. I'll regain that length and more in no time!
This DIY was so much fun to do and I can't wait to track my hair growth until I hit hip length one day. Getting there will take years to accomplish but I'm determined to grow healthy natural hair and enjoy the results of my hard work.

Thank you so much for reading and let me know if you plan to create your own length check shirt. Take a picture and post it to my Facebook page or to Instagram using the hashtag hairhealthandheart so that I can see your awesome creations. ¡Adiรณs, chicas!

4.03.2017

Rice Water Rinse Update

Welcome to April, everyone! I hope you all had a great weekend and I'm wishing you an awesome week ahead. If you saw my update on Facebook and Instagram, you'll know that I took an unexpected hiatus last week. I've been very busy with school and work, and as much as I would like to shell out a post every day that's just not possible with my daily schedule. But it is what it is. 

I am so excited to give you my thoughts on using the rice water rinse because of the amazing benefits I've been noticing so far. I added this to my hair regimen almost two months ago after stumbling upon an article about the Yao women of Huangluo Hongyao village in China, who use fermented rice water to aid hair growth and to keep their hair manageable and black well into their octogenarian years. You can read more about their interesting traditions here. 

Although I was amazed that all these women had hair that touched the floor, I was honestly very skeptical. So I did more research on the benefits of using fermented rice water on the hair. Rice water has amazing benefits for both the hair and skin, full of antioxidants, minerals; and it is known to restore damaged hair, protect it from further damage and improves elasticity. But what rice water contains most importantly, is the carbohydrate Inositol, which has long-lasting effects on the hair even after rinsing. 

Since I've been rinsing with rice water, I've noticed a huge difference in manageability and softness. Guys, my hair is so soft! And it no longer feels dry when I wear my hair in twists for the week. I've also recently noticed that the shine in my hair has been slowly restored. While everyone does their own rice water recipe differently, here's the recipe that I custom made for myself. 

Now, I just don't use any old cheap rice that you pick up at the store. I chose to buy this organic brown rice from my local bulk store because I know that I'll be using it for my hair. 
I don't want to use just any rice that may contain pesticides, but it may be more economical to use the cheaper kind if you're just using it for your hair. I typically start the process the day before wash day to allow the mixture to ferment. Some people may choose to let it ferment for two days but one day is good enough for me. I use probably a 3/4 cup of rice, which I give a proper rinse in a strainer before adding it to my 64 oz glass jar. Having a glass container is important because there will be some deep fermentation happening in there. Then I add about a cup and a half of water, screw on the lid and leave it in a dark corner for 24 hours. 
This is what you'll end up with the following day. 
Before I use the rice water on my hair, I strain the rice in an old strainer and add the water into a pot and allow it to boil. 
Boiling the mixture stops the fermentation process. If you try this, expect your kitchen to smell like a wet dog. But you can add a few drops of essential oil into the water so that it doesn't smell too bad. Let the hot water cool either until it's warm or cooled completely.  

I tend to use rice water to rinse out either deep conditioner or a protein treatment before the final cold water rinse. It is not advised to use rice water as a final rinse because it may leave behind a residue in your hair. I repeat the process twice by pouring the water on my hair, making sure that it lands in a bowl below my head to catch what is left. I massage my scalp for about a minute, pour the mixture over my hair one last time and massage for another minute before thoroughly rinsing my hair and scalp with cold water. 

I rinse with rice water at every week, leaving out the last week of the month for an ACV rinse. It's also important to mention that you'll see the benefits of this rinse much quicker with a proper diet. A double whammy is what will kickstart the growth. For me, it took probably two weeks before I noticed how soft, shiny and strong my hair had become, and I hope that if you try this rinse, you'll see those benefits as well. 
I finally hit collarbone length! I should probably do an official length check soon. ๐Ÿ˜
Let me know if you will add rice water into your hair or skin regimen because you won't be disappointed. I hope you enjoyed reading today and have a great Monday!

3.21.2017

Moringa and My Past Hair Growth Methods


Based on my own experiences in my past hair journey, I am an advocate of using vitamins and oils that encourage hair growth and nourishment such as Jamaican Black Castor Oil, Peppermint oil or Grapeseed oil. I'm also a firm believer that one should not expect growth by slapping on these oils on their hair and doing nothing else. With a proper hair regimen, a healthy diet, you will most likely see the benefits of these growth aids much quicker. I first learned that lesson when I started my relaxed hair journey several years ago. I was obsessed with gaining growth and I remember immediately purchasing a 3-month supply of Hairfinity vitamins hoping to achieve the incredible results that I saw posted all over social media. 
I went through the first two bottles unsure whether I got results. My hair was still growing because of my developing a hair regimen, but it wasn't until I adopted the best regimen for my hair that I began to see results as I started the third supply of Hairfinity. Once the supply was complete, I did not buy Hairfinity again for two reasons: It was expensive and I found a much cheaper alternative to Nature's Bounty Hair, Skin and Nails vitamins. 
At the time I did not realize it but using both the hair vitamins and my hair regimen at the time was the dynamic duo that helped me to quickly grow my hair. 
Hairfinity and Nature's Bounty actually have the same amount of Biotin (2,500 mcg) but I preferred Nature's Bounty because they were--at the time--$7.99 and so yummy! I took these vitamins religiously along with massaging my scalp every night using Jamaican Black Castor Oil and sticking to my hair regimen. 

My hair regimen itself has not changed much, but somewhere along the line, I realized that a healthy diet was the third and most important key to unlocking my true hair growth and health potential. As someone who loves to eat, it has been a huge challenge to adopt healthier eating habits. I'm still not quite there but slow progress is better than no progress. If you read my first Smoothie Saturdays post this past weekend you'll know that I've been adding healthy yet delicious smoothies into my diet. This is where the Moringa comes in. Moringa is actually grown here in the Virgin Islands, and while it would've been beneficial for local businesses to purchase my Moringa here, my busy schedule had me turning to buying it online. 
I bought this one pound bag of Moringa leaf powder from eBay and I can't wait to use it because of the amazing benefits of Moringa. It's full of antioxidants that keep your organs functioning at their best by treating and preventing diseases. It's also rich in vitamins such as Vitamin A, C, E, Protein, Potassium, Calcium, Copper, Iron Magnesium, and Zinc. It's great for your overall health, pretty much. But what Moringa does for your hair is why I will be incorporating it into my hair regimen. It increases hair growth, prevents hair loss and dandruff which is exactly what I have been looking for. As I adopt healthier eating habits, I'm looking towards more natural products to use on my hair and body. I actually added some Moringa powder into the smoothie that I made yesterday but I'll give you the details in my next Smoothie Saturdays post. ๐Ÿ˜‰

In Thursday's post, I'll be showing you how I make my updated hair growth oil using Moringa and Fenugreek. Thanks for reading and I hope this post inspires you to try Moringa. Of course, if you've never used it before just be careful. Use it in small quantities and if you're not sure I recommend consulting your doctor. Everything in moderation! Take care and have a great Tuesday night!